How Do I Start A Blog?

This is Not What I Signed Up For!
Hold up...why do I need a blog? I never asked, "how do I start a blog?"!? I thought you were going to teach us about becoming a SOCIAL MEDIA influencer?!
Relax...I am...take a chill pill sassy pants. I have a point! It doesn't matter if you want to be an influencer on YouTube or Snapchat or Instagram...you still need a home base. Why? Because what happens when the platform you're a celebrity on up and disappears? Myspace? Vine? Ring a bell? What happens when they change their algorithms and you have to PAY to reach YOUR FANS? Wouldn't you rather already have those people on lock? Facebook Pages ring a bell?
Now you can do whatever you want, but when you hit 100k followers on Instagram and your account gets hacked, don't come crying to me!
Stop!
Before you move on to creating your blog, make sure you take the 5 steps to become a social media influencer:
- Pick a Theme
- Pick a Place
- Pick a Schedule
- Automate
- Grow
You can find more detail on these steps in my free e-book! Be sure to grab that before you move on!
Click here to grab your free e-book.
Get Started with Your Website!
Okay, now you're ready to get started with a website! FULL DISCLOSURE I'm a Bluehost Affiliate! Why? Because I chose to use them for my own site. I chose Bluehost because it was the easiest to set up and had the lowest price point. Then I found out I could make money by becoming an affiliate! So if you do decide to create a website with Bluehost please use my link! (it's right below)
Step 1: Click the link below!
www.bluehost.com/track/azaleemaslow
You will be brought to this page! (Below)
Step 2: Click the GREEN "get started now" button!

You'll be brought to this page.
Step 3: Pick Your Plan!
If you're just getting started you'll be fine with the first option. You can always upgrade later.

Once you choose a plan, you'll be brought to this screen.
Step 4: Pick a Domain Name!
Ideally, you'll want to match what you're using as your username on social media. It will make you easier to find!

You cannot use a domain that someone else is using. If you try to, you'll get this error message, and have to try a different domain.

Next, you will be brought to this page.
Step 5: Complete Account and Package Information.

That's it! You'll be brought to a congratulations page!
But seriously...what do you do now? The easiest way I've found to start building your site (especially if you're making a blog type site) it by using WordPress. So here's...
How to Install WordPress
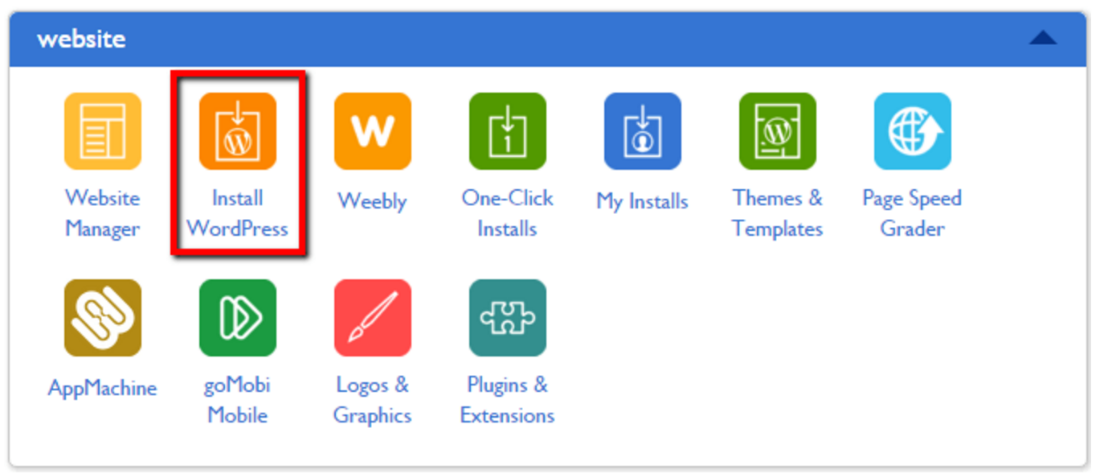
Step 1: Click on Install WordPress (While you're logged into your Bluehost account)

Step 2: Choose "do it yourself" and click "Install"

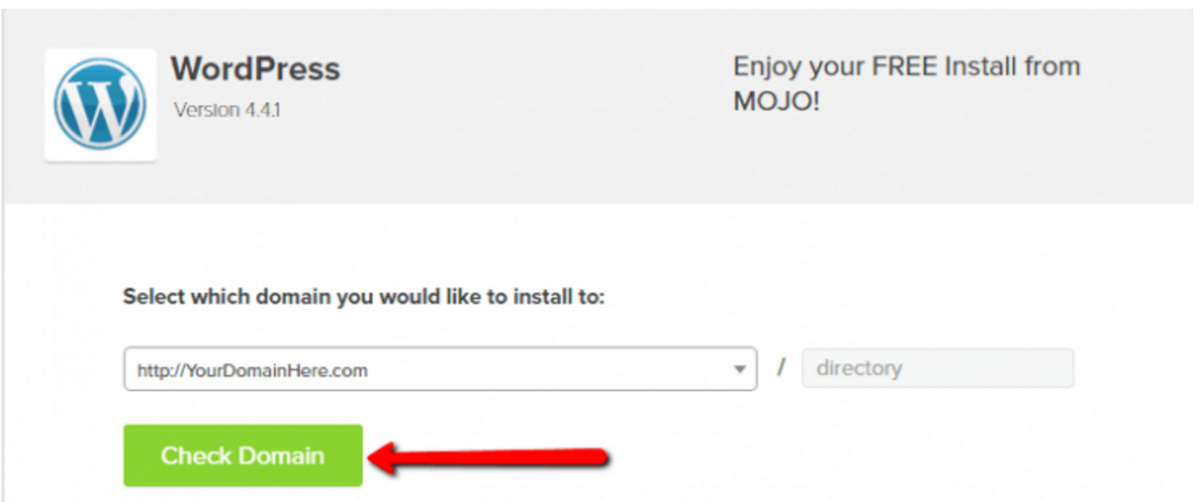
Step 3: Click "Check Domain"
Step 4: Check That You Agree and Click "Install Now"

Step 5: Just wait for WordPress to Finish Installing!
Customize Your Website!
Okay, I'm sure your next question is...how do I make my website look cool? Or how do I customize it?! Okay, so to be clear... You'll now have a log-in to your BlueHost Account AND your WordPress Account. Log into BlueHost to update things like creating an email with your website and adding new domains. You can log into WordPress if you want to change the look of your website, "embed" anything onto your website or post new blog posts. So here are the steps to change the appearance of your website!
Step 1: Go to the Left Side of Your Screen While Logged into WordPress. Click "Appearance" then "Themes".

Step 2: Click "Add New Theme".

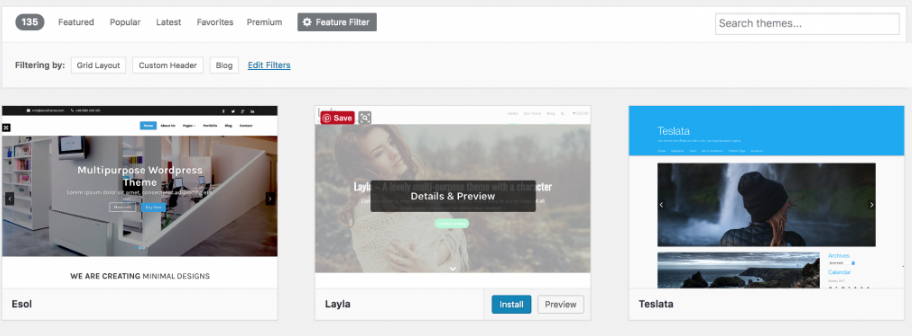
Step 3: You Will Be Brought to this Page. Click "Feature Filter" to Apply Different Filters.

Step 4: Check the Filters You Want to Apply and Click "Apply Filters".
These are all the filters you have to choose from. I've checked off a couple that will give your great results.

Step 5: You Will Be Brought To Your Filtered Results. (These are FREE!!!) Click "Install" Once You Find the Right Theme for You!
Step 6: You Did It! Now You can Customize each page you add and start creating blog posts!
Congrats!
This blog is built on Kajabi (not WordPress). Let me know if I should do a tutorial on how to set up your Kajabi site!
Bonus Tip:
While logged into WordPress, look at the left side of your screen (the black menu). You will see "Pages". This is where you can add, delete, and edit pages. Pages are what appears on my website when you click "Start Here!", "Blog", or "Contact". You will also see "Posts" on the left side. Posts are blog posts like this one you're reading right now. I hope this helps! Leave a comment and let me know what you're building a website about! Also, let me know if you have any questions or if there's anything you want me to go more into detail on!
Psst....Pin this Blog Post to Pinterest with this Image!

PrettyAF Insider Access
Share your details to receive heartfelt updates, early invitations, and first access to whatever unfolds next inside PrettyAF Powerhouse.
We honor your inbox. Only intentional, high-value updates. Unsubscribe anytime.


